Like any kind of path, a sales path leads you where you need to go. Using sales paths helps your sales reps adopt and adhere to your company’s sales processes without getting sidetracked. Paths guide your sales users and help them stay focused on important sales tasks so they can close their deals quickly. The Path component is used on the opportunity, lead, campaign, contract, contact, order, and custom object record detail pages in Lightning Experience.
Step 1: From your Salesforce Setup, type Path in the Quick Find box. Select the Path Settings and then click the Enable button.

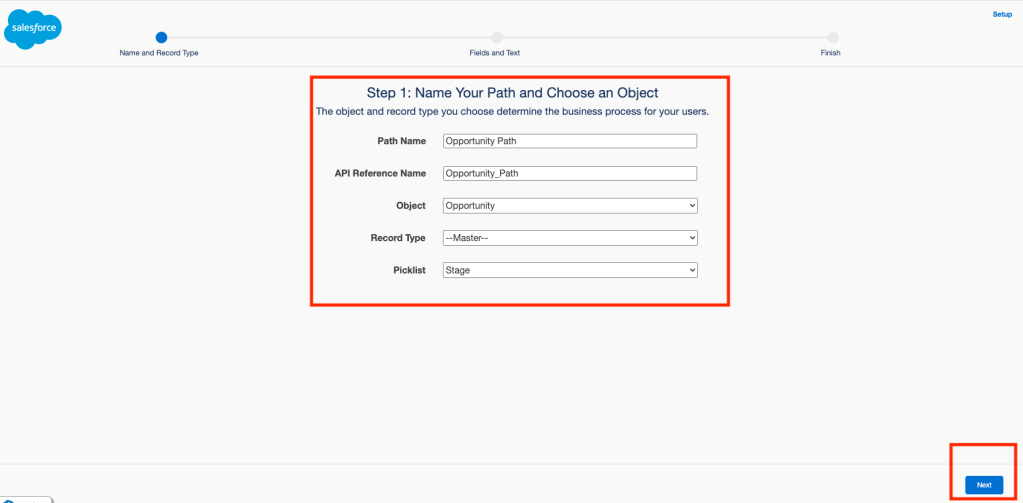
Step 2: Name your Path by choosing the object. On this example we’ve used the Opportunity object. Remember that for some object you may have Record Types and in that case these need to be defined as well. Once you do that click on Next.
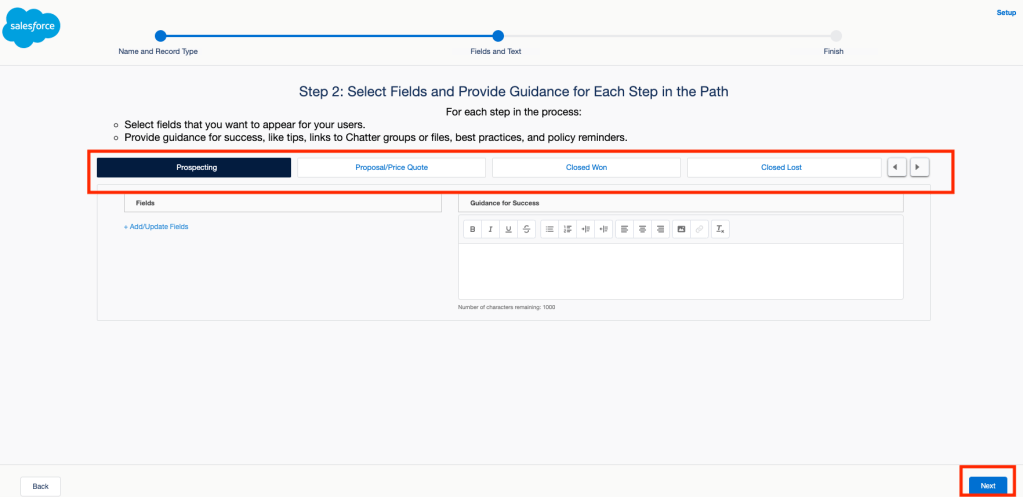
Step 3: On this step you will need to choose the fields for each stage in order to display in your page areas.
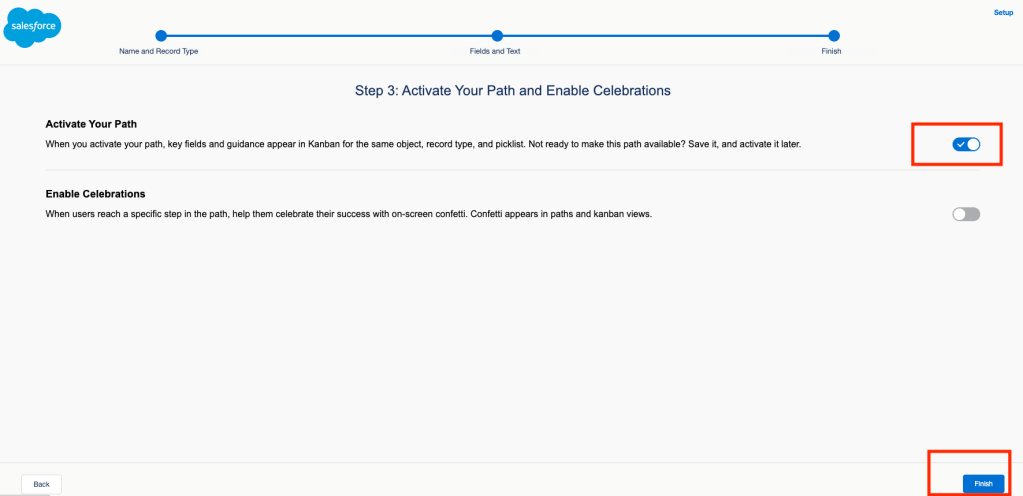
Step 4: Don’t forget to Activate your path. Once you do that click Finish.
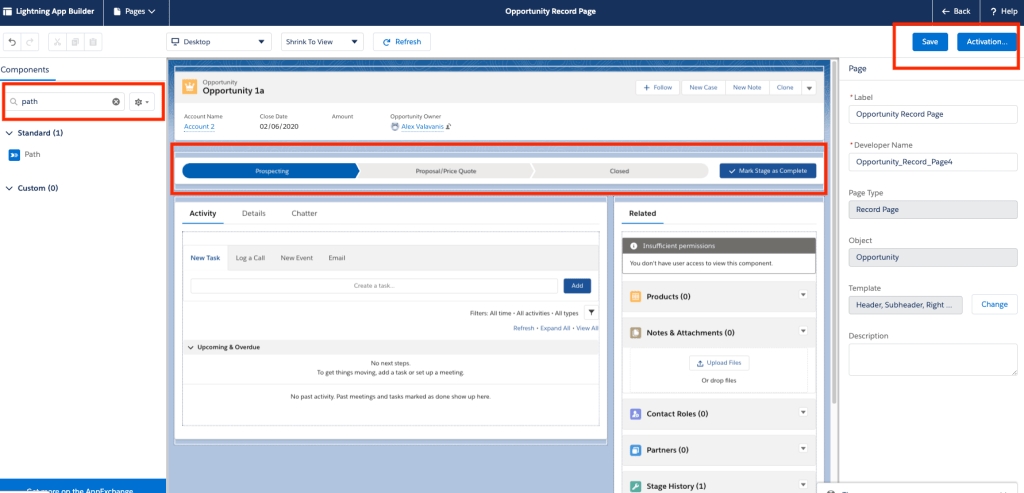
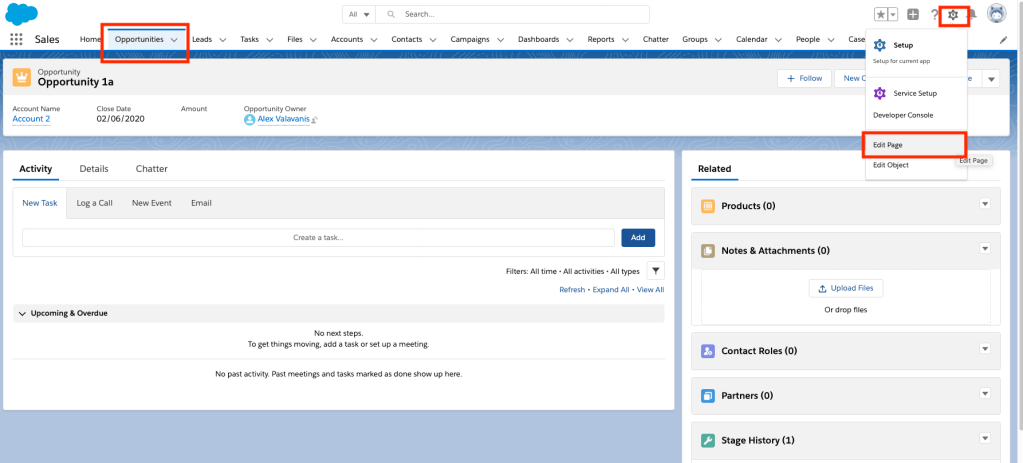
Step 5: Now you need to activate your Sales Path in your Lightning Page. Choose an Opportunity record, click on the gear icon and then choose Edit page.
Step 6: Type Path on your search box and drag it to your page. Click Save and Activation. Go back to your Opportunity record and you will see that your Sales path is now visible.