Use Case is to allow the users to create expenses from the contact object. For the below scenario we are using 4 different types of expenses and we can add up to 4 expense records. User will click on the button, a window will pop up which will include some of the contact’s details and user will add his/her expenses.
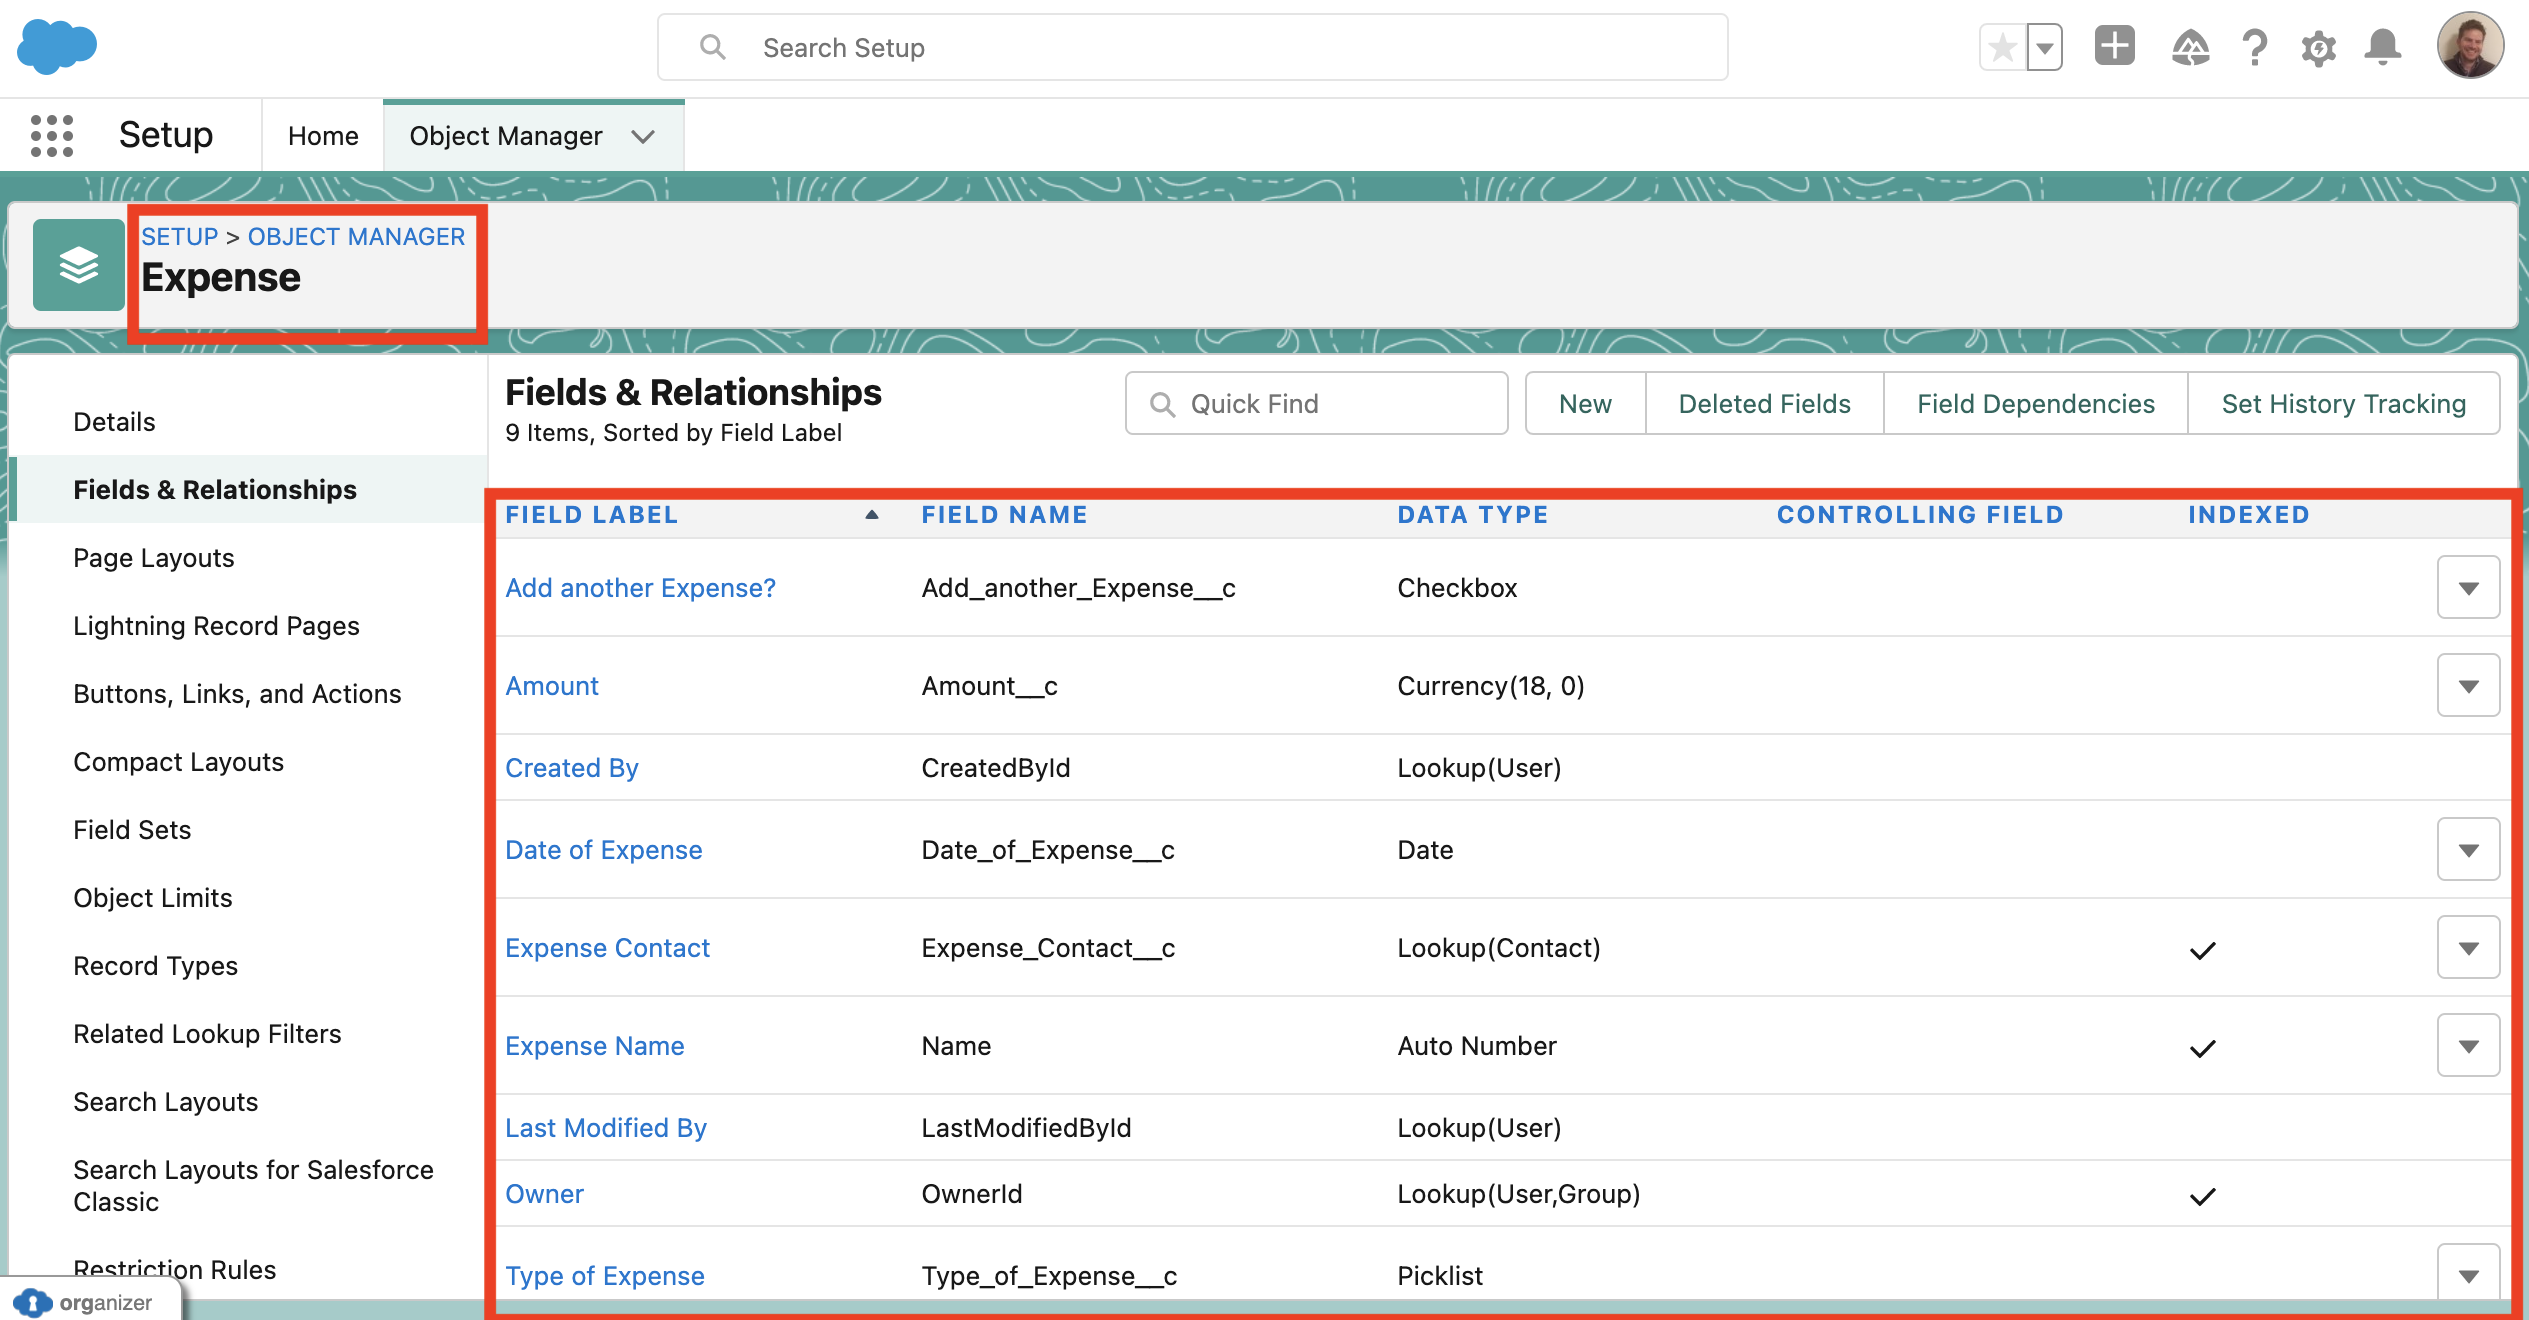
Step 1: First step is to create a custom object and name it “Expenses”. We also need to create the following fields within the object.
- Amount ( Currency)
- Date of Expense (Date)
- Expense Contact (Lookup to Contact object)
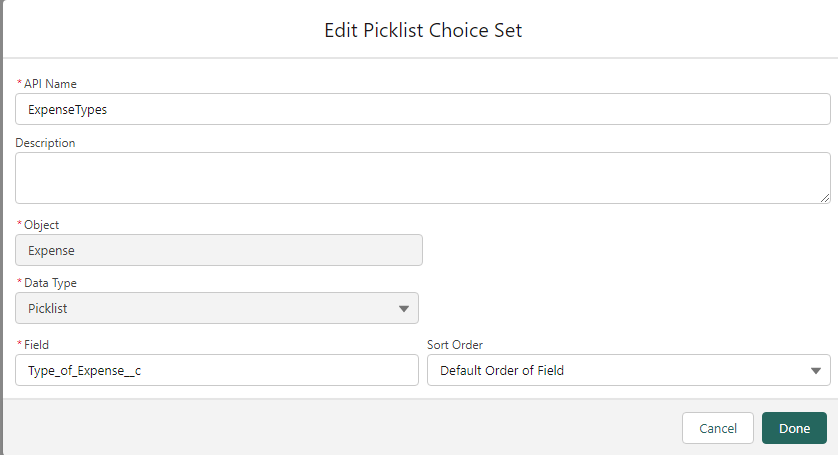
- Type of Expense (Picklist)
- Add another Expense? (Checkbox)
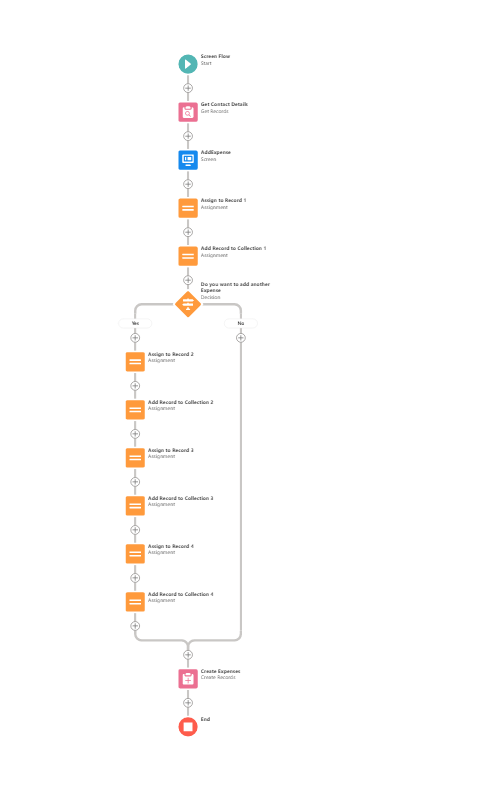
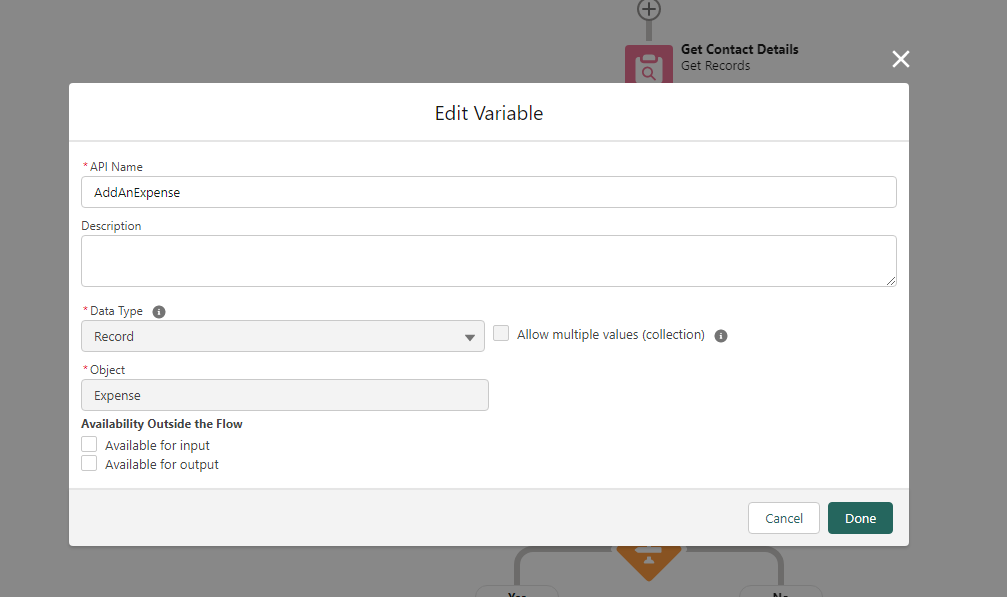
Step 2: Go to Flows from your Setup and create a Screenflow. Firstly, We will create a record variable which we are going to use in our “Get” element. Variable will be the below:

See also video of the recordId and “Get” element below:
Step 3: We create the Screen Element. First i want to do is add a Display Text as my desire is to bring some details from the Contact record by using the “Get Records Contact”.

I then added a section with 4 columns. These columns are always visible and required.


I am then creating another section, however for each Label I am creating some logic which will allow the user to view the next section if the field “Add another Expense?” is checked. Please note how I change the API’s for each label.

See Video below:
Step 4: Once we created the Screen element I need to assign this to a record so I need to create another variable to which I’m going to use to assign the screen flow to that to that record.
Step 5: Create the Assignment Element

Step 6: Create a Record Collection Variable.

Step 7: Create the second Assignment element.

Step 8: Create the Decision Element. This will allow us to either create one record or stop.

Step 9: I am creating more Assignment elements ( Assign to Record 2, Add Record to Collection 2 etc. etc.) As you will see on the video below everything on the right hand side is the same as the “Assign to Record 1, Add Record to Collection 1” elements, but everything on the left hand side it shows the second API values. You can add as many collections as you want but for this flow we created 4 (i.e. we can add up to 4 expenses) – video below
Step 10: Finally Create the Create Element.

Step 11: Activate and save the flow.
Step 12: Create the Action on the Contact object and add it to the page layout.
Demo Result below