Below you will see a step-by-step guide, from which we create a flow for a custom object called “Customer”. Whenever a Customer record is created or edited a new account and contact is generated with the predefined values mentioned (the flow will execute when Status=Very Strong). Before we start let’s mention the requirement:
Scenario: When a record is created or edited on “Customer” Object, an Account and Contact is created with all the populated fields in the “Customer” Object.
Please note that for this exercise we have defined the prerequisites:
• We have created a Custom Object “Customer”. Within the custom object we have created the following fields:
•Account field (Look-Up)
•Company (Text)
• Phone Number (Phone)
• Email (Email)
• Job Title (Text)
• Status (Picklist)
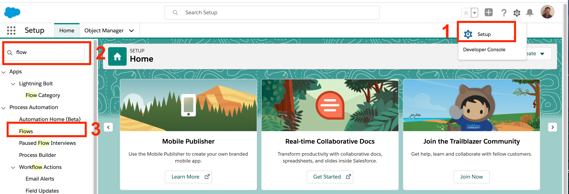
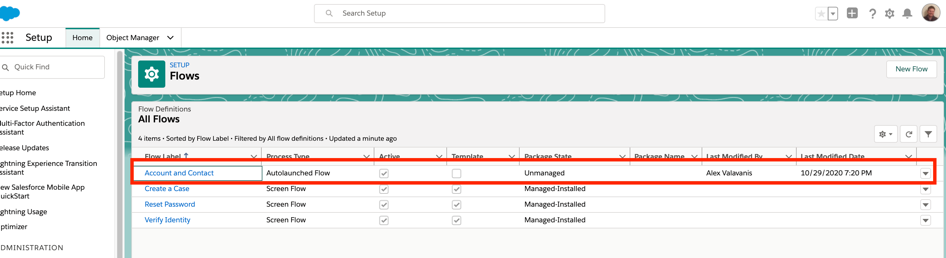
- Create a Flow
2. Click “New Flow” and then choose “Autolaunched Flow”.
3. Create a variable for Customer.


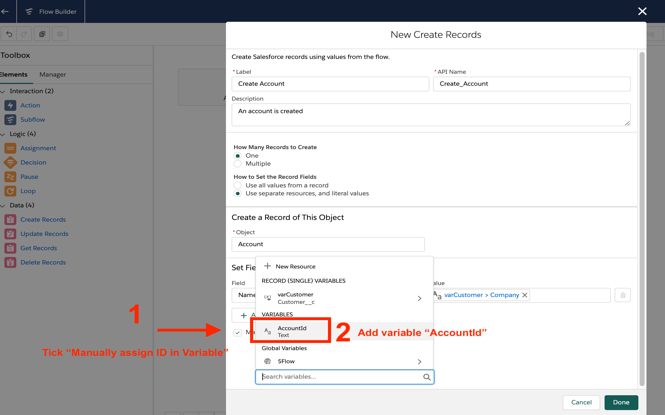
4. Create a variable for Account (this variable “AccountId” will link Account and Contact).

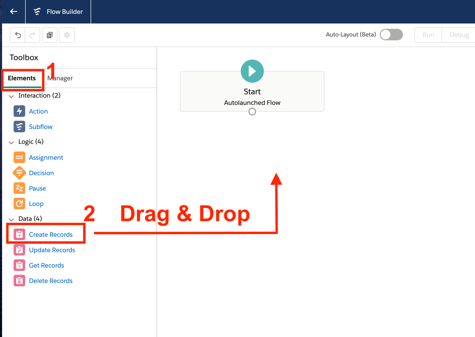
5. Elements. Go back to ”Elements” and drag and drop “Create Records” drop into the screen.

6. Elements – Create Records for Contact (Drag & drop “Create Records” to the screen).

Set field values for the Contact. Add the values as created (1,2,3,4,5). Then click “Done”.

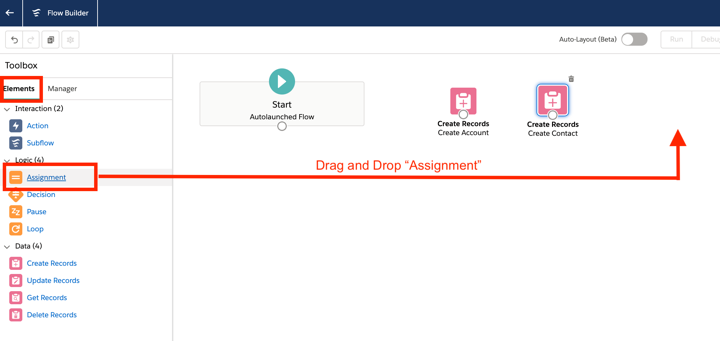
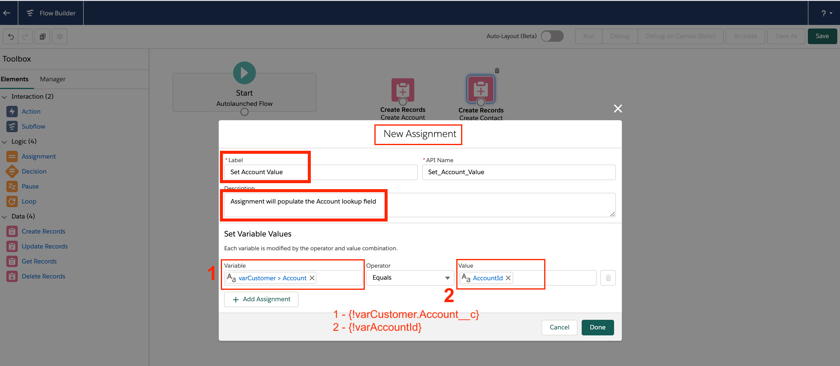
7. Drag & Drop “Assignment” to the screen.
Fill the Assignment values as shown on screenshot. Then click “Done”.
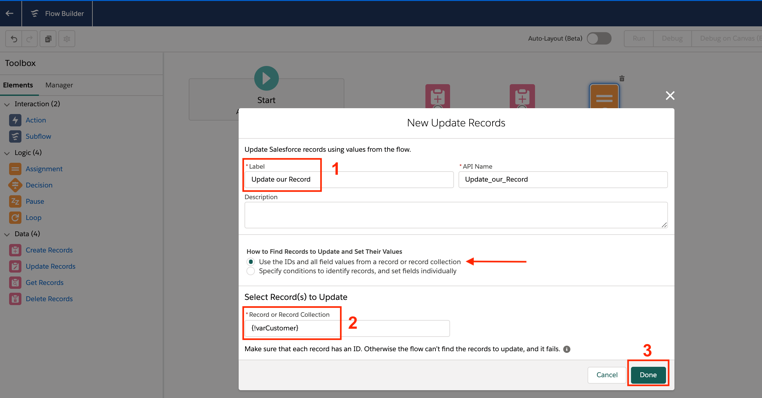
8. Drag and drop “Update Records” on the screen.
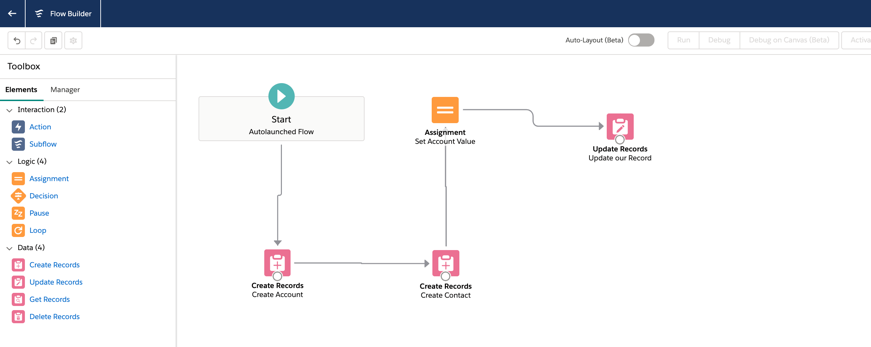
9. Link the Elements created.
10. Save your Flow and activate it.
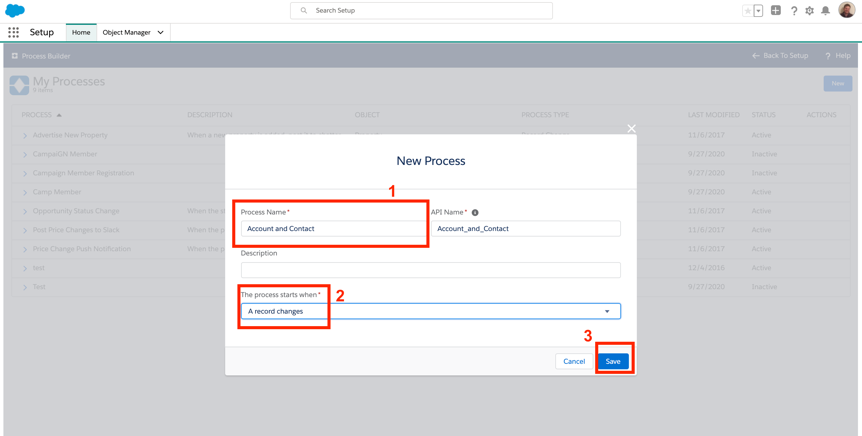
11. Next step is to create a Process builder. Type “Process Builder” in your “Quick Find” search box and then click on “New”.
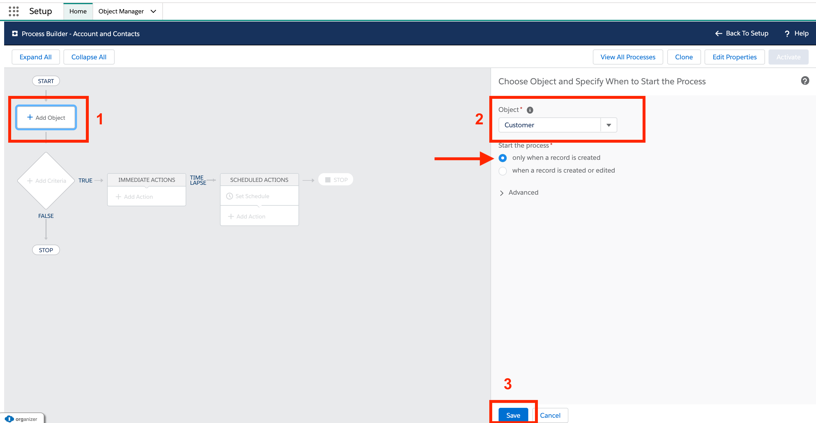
12. Choose the Object in order to specify when to start the process.
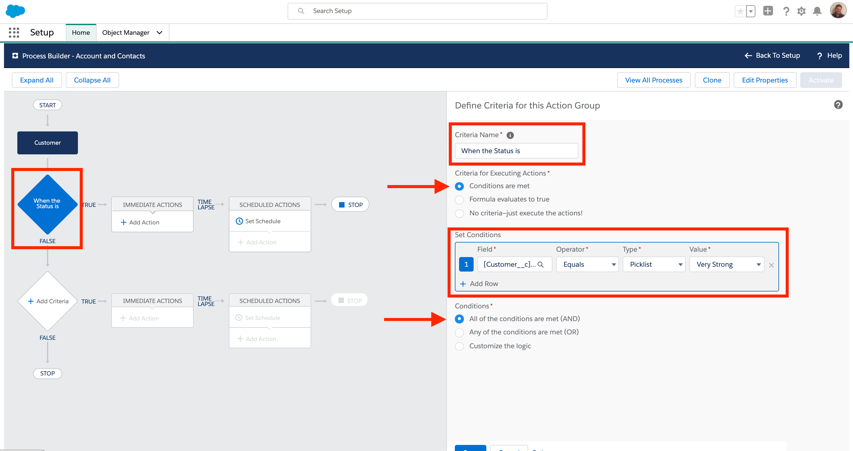
13. Define the criteria. In this example we have a Picklist field in the “Customer” object called “Status”. We want this to execute when the value is created/updated to “Very Strong”.
14. Define the action as shown below. Once this is done click “Save” and “Activate”.

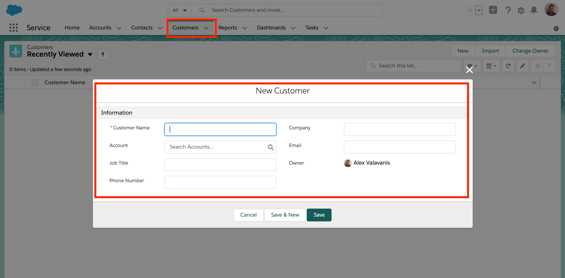
15. Done! Now you can TEST! – Create a New Customer.

16. You will notice below that an Account has been created with the same name as Company from the Customer Object.
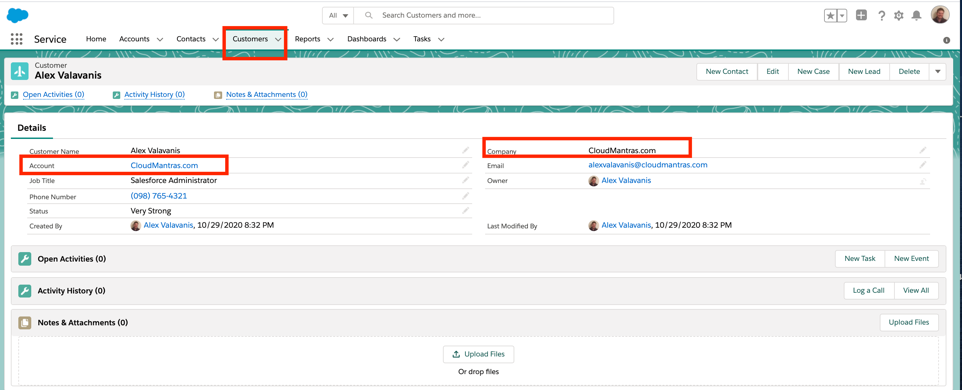
You will also noticed that a Contact has been created as well.

